4 SignalFlow: Setup Tab
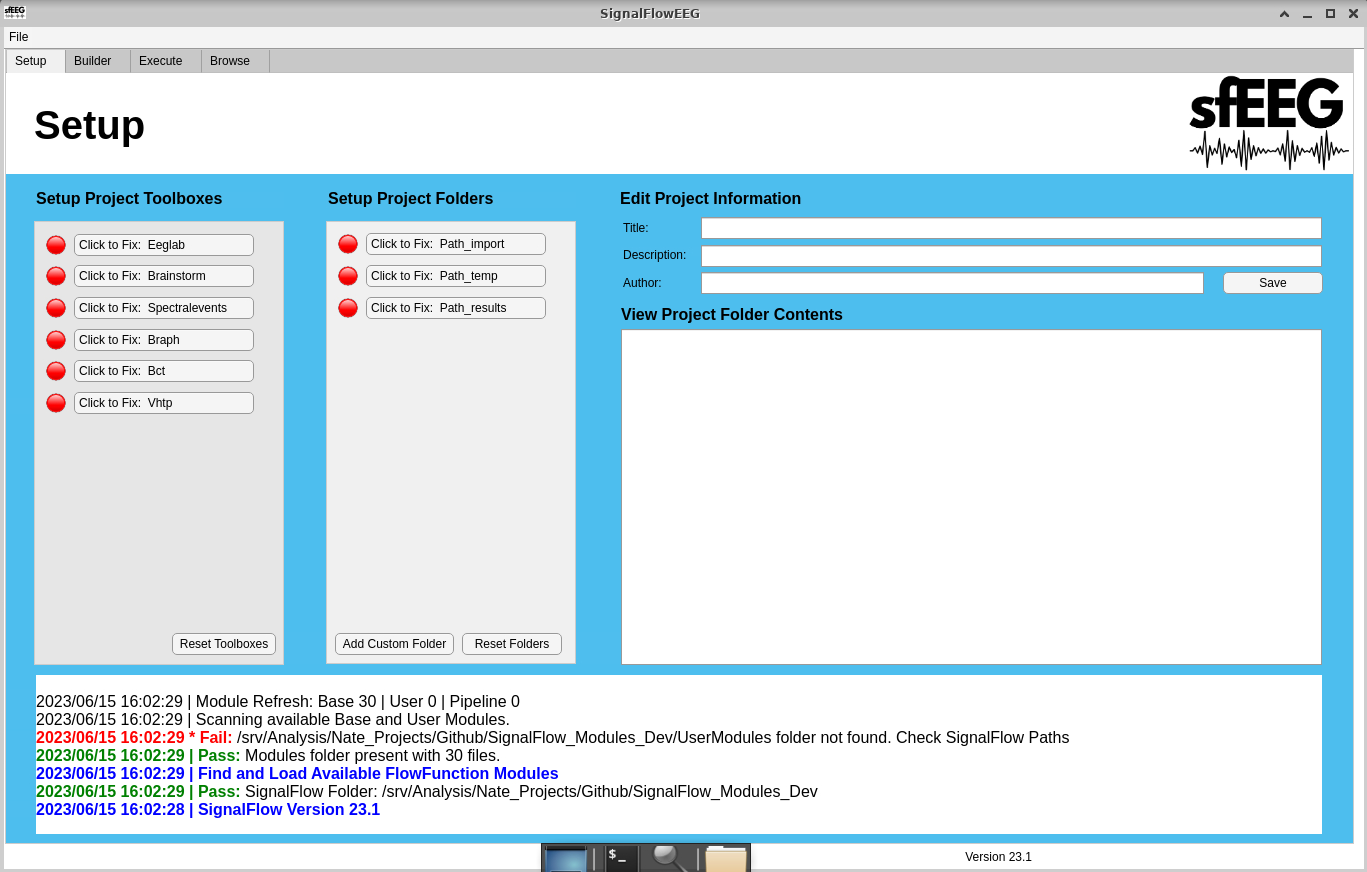
The setup tab is the starting page for every user. It allows the user to configure their workstation and pipeline. This includes adding the correct paths to toolboxes and also adding folder locations for data.
In SignalFlow, assigned folders are given tags. These tags are used to reference the folder locations in the pipeline. This allows the user to change the folder location without having to hardcode a foldername into their code. This is useful when sharing code with other users.
4.1 Adding toolboxes to the MATLAB path
- Navigate to the “Setup” Tab.
- Decide which toolbox/dependency you would like to add to the MATLAB path. A. A Red circle indicated the toolbox/dependency has not been added. B. A Green circle indicates that the toolbox/dependency has been added.
- Left-click on the “Click to Fix: Insert Toolbox”.
- File Explorer will open.
- Select the directory that contains your toolbox. Click “Open” in the file explorer. A. This can vary based on the toolbox, contact us if you have issues .
- The circle should turn from red to green, may take a second due to SignalFLow checking if it’s the right toolbox.
4.2 Adding Project Folder locations
- Navigate to the “Setup” Tab.
- Decide which folder you would like to add. A. A Red circle indicated the folder has not been added. B. A Green circle indicates that the folder has been added.
- Left-click on the “Click to Fix: Insert folder”.
- File Explorer will open.
- Select the directory you would like to add. Left-click “Open” in the file explorer.
- The circle will turn from red to green.
4.3 Adding Custom Projct Folder locations
- Navigate to the “Setup” Tab.
- Left-click the “Add Custom Folder” button.
- A Matlab figure will open.
- Left-click the “Select Directory” button.
- Select the directory you would like to add. Left-click “Open” in the file explorer.
- Enter a tag. A tag is an easily recognizable name used for selecting this Projct Folder later.
- Left-click the “Confirm” button.
- A new project foler will be added. The circle will turn from red to green.
4.4 Edit Project Information
- Navigate to the “Setup” Tab.
- Enter a Title for your project.
- Enter a Description for you project.
- Enter an Author for your project.
- Left-click the “Save” button.